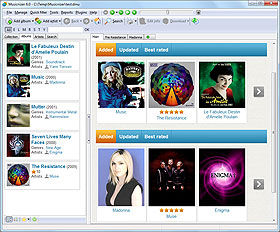
Illustrated Music Catalog For Dune HD
With Musicnizer you can create an illustrated music catalog for your Dune media player. There are many advantages in having such a catalog as opposed to using 'raw' files and folders. For example, the catalog will allow you to sort your music into various categories, browse discographies of artists, read reviews, see covers and additional information, and much more. With such a catalog, it does not matter where exactly your files are stored: on your computer, on a Dune hard drive, on a NAS, or anywhere else on the network.
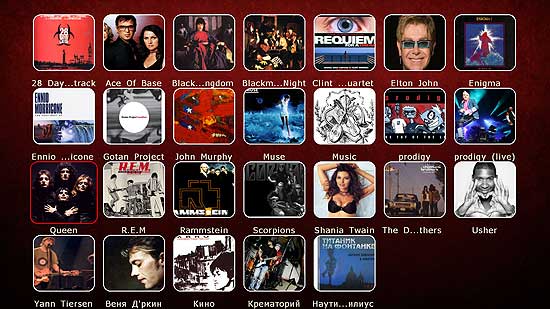
Before starting to create your Dune music catalog, add your music albums to Musicnizer first. You can simply scan folders for audio files and let the program extract necessary information. Of course, it is also possible to add album titles, but the former method is quicker. When adding album titles, Audio CDs, or barcodes, you need to specify paths to actual files, while with the 'scan folders' method paths will be added automatically.
If you'd like to include information about artists into your Dune catalog, download information about artists from the internet.
Once your music albums are in the collection, you can create an illustrated music catalog for your Dune player.
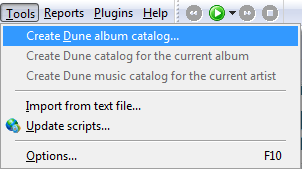
In Musicnizer, select "Tools" - "Create Dune album catalog":
This will start the Dune catalog wizard. A few words should be said about its settings. While the wizard is very flexible, and many settings can be adjusted manually, new users may simply click "Next" through all the pages. The program automatically detects and uses the best settings.
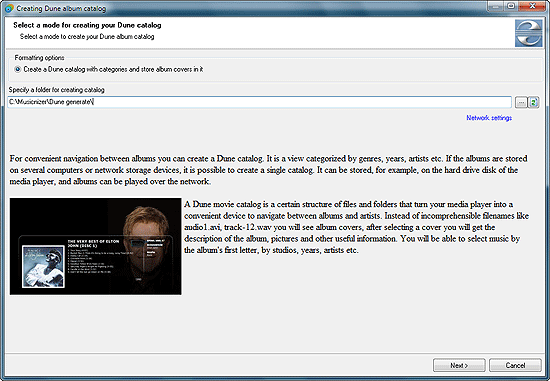
First, choose a folder for your Dune catalog. If your Dune is online and has a built-in hard drive, Musicnizer will recognize this and suggest to create a folder on the Dune hard drive. This is recommended option. However, you can also create your music catalog in any other folder - for example, on a memory stick, or on a network drive.
Click the "Network settings" link on the right if you'd like to select a network protocol manually or if the folder to which you want to upload your catalog is password protected.
Click "Next" to proceed to the next page.
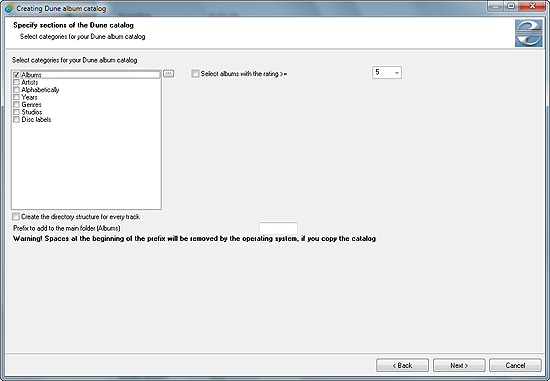
Here you can select categories for your music catalog to be displayed on Dune. The main category is "Albums" (it can be renamed to whatever you wish, just click "..." on the right to enter another name). Additionally you can export information about artists, sort albums alphabetically, by years, by genres, studios, disc labels. On the right, you can see the option to select albums rated better than a certain value. Tick the box if you'd like to use this option.
Below the list of categories, there are a couple of other options:
- Create the directory structure for every tracks - this creates an interactive track list for every album. Thus you can not just start playing the entire album, but select and play a particular track.
- Prefix to add to the main folder (Albums) - here you can enter a prefix for your folder name. A prefix like "!" will put the folder to the very top of the list, so you will not need to search for it among other files and folders on your Dune player. Please note that if you use a space as your prefix, it will be removed if you copy your catalog, so some features of the catalog may not work properly.
Click "Next" to proceed.
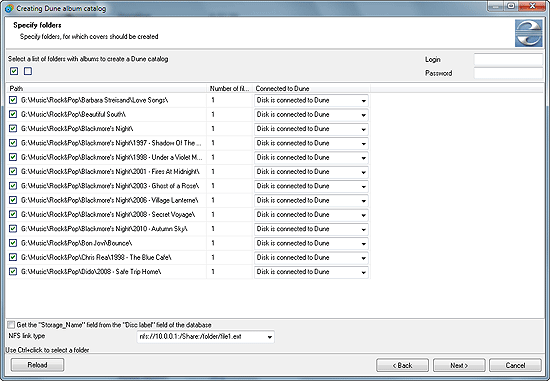
The third step will suggest that you select folders, for which a Dune music catalog should be created. If you'd like to select or unselect a particular folder use "Ctrl" + click. A simple click will select or unselect the entire tree on the given storage device. This will not affect folders on other storage devices.
In the "Connected to Dune" you can choose the connection method. If the hard drive (or other storage device) is connected to Dune directly (examples: memory stick, USB hard drive, internal hard drive of Dune), choose the "Disk is connected to Dune" method. If your Dune plays movies over the network, specify the preferred protocol: SMB or NFS.
In the right upper corner you can specify your login and password information, if necessary. Please leave these fields blank if your shares are not password protected.
At the bottom of the window, you can use the "Get the Storage_Name field from the Disc label field of the database" option. This may be helpful if the Storage_name information is currently unavailable (disk not connected).
From the "NFS link type" dropdown menu, select the preferred type of NFS links. If you do not know what should be selected here, just use the defaults.
Click "Next" to proceed.
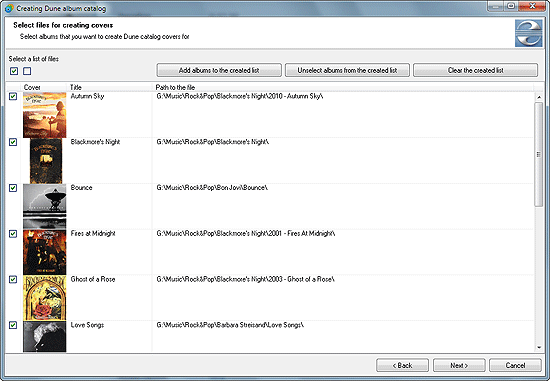
Here you can select individual music albums for your Dune catalog. Please take a look at the three buttons at the top:
- Add albums to the created list - this will add all selected albums (with a checkmark) to a special list. When later you decide to update your Dune music catalog with new albums, you can simply use the second button:
- Unselect albums from the created list. This removes checkmarks next to previously added albums, so you do not need to re-create the catalog from scratch. Only new albums will remain checked.
- Clear the created list. This will reset the 'created' list, so the program will not remember anymore if there is a Dune catalog structure for a particular album. This may be useful if you want to create your catalog anew.
When creating your catalog for the very first time, you can simply click "Next".
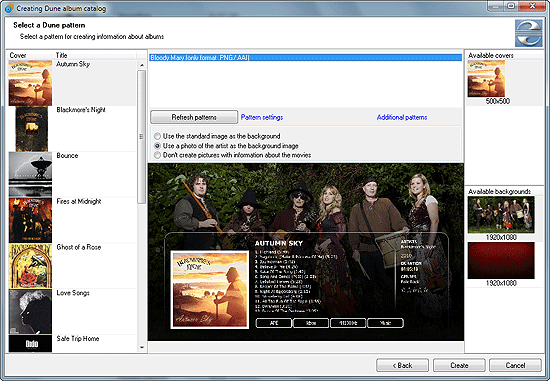
On the final page of the Dune catalog wizard, you can select the main pattern to be used (it defines the general layout), choose cover images and background images for every album, adjust other settings. All changes are applied immediately in the preview area.
On the screenshot above, we decided to use photos of artists as background images for our albums (the second option in the center of the screen). On the right, there was one choice for the cover and two choices for the background image. In your collection, you may see more images, if you added more covers or photos of the artist.
Click the "Create" button to start creating your Dune music catalog.
