Download Information About Music Albums From The Internet
The music organizer can manage albums and artists in a number of ways. You can add existing albums to the program in several ways: add album titles, scan audio files and folders, read information from Audio CDs, enter barcodes using a barcode scanner, a webcam, or manually. With any method, you can let the program download information about your music albums from the internet, using one of the supported online music database. The information may include: album covers, reviews, track list, and other important details.
In the lower part of the Add album window, you there are two checkboxes:
- "Download information about the album from the internet" - if this is checked, the program will download information about the entered album titles from the internet. Information typically include: album cover, track list, artist, year etc. If you uncheck this box, you will need to enter information about albums manually (as much as you wish).
- "Automatically select the first album from search results". Typically, when looking for an album title on the internet, the program gets multiple results that may refer to your title. Sometimes albums from different artists have the same name, sometimes there are several editions of the same album etc. If you check this box, the program will not display any search results, but grab the first result in the list automatically. While useful for rare album names, this option may be dangerous in the situations described above (same album name for completely different albums etc.). By default it is disabled.
We decided to download information about our albums instead of entering it manually. But where Musicnizer will download information about music albums from?
![]()
Let's look at the title of the window. It shows "Add/update album [MusicBrainz (English)]". So, information will be downloaded from MusicBrainz. We can change this: Musicnizer supports a number of online music databases.

At the bottom of the "Add album" window, you can see the "Options..." link in the lower right corner. Click it to open the menu of supported sites.
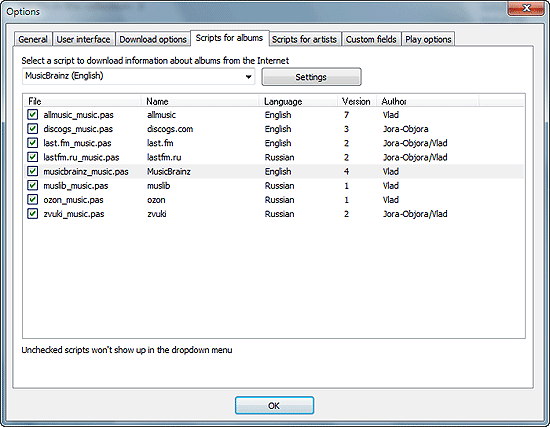
The list of scripts may be different on your system. The latest versions of scripts and new scripts can be downloaded via the script updater.
The window shows some basic information about scripts: filename, name of the music database, database language, script version, author. For this example, we will switch from MusicBrainz to last.fm. You can select a script either from the dropdown menu at the top or by clicking the script directly in the list.
Click "OK" to confirm changes. This will close the above window. We are back to the first step of the "Add album" wizard. Now, let's click the "Next" button (not shown on the screenshot).
Musicnizer performs an internet search and shows us available albums:
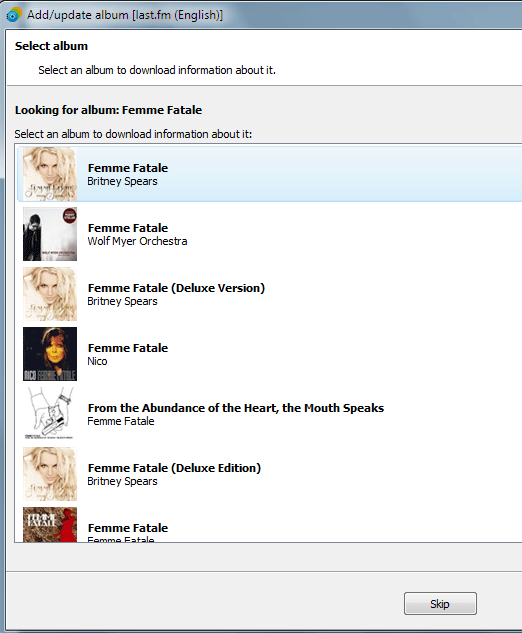
Select the one that you have and click "Next" (or simply double-click the result).
Musicnizer will now download information about the music album from the internet. If you have entered several titles, the program will automatically save the downloaded information and search for the next album. If you entered only one title, you will be able to edit the downloaded information before saving it to your database:
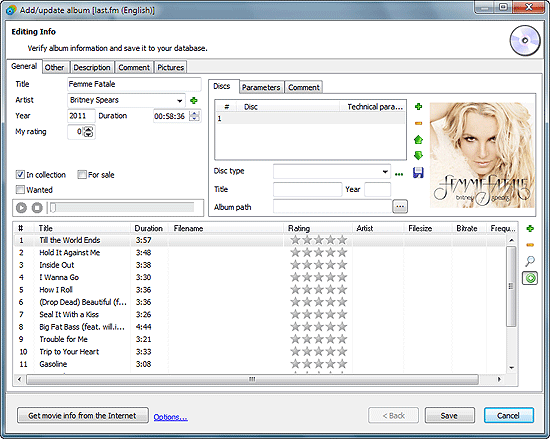
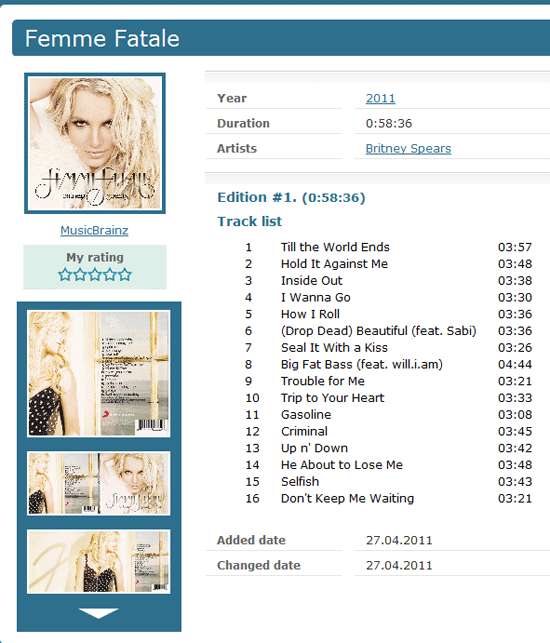
We will discuss editing album information in another section. For now, we just click "Save". This will close the window and forward us to the album page:
If the album is available locally as music files, you may consider adding links to the files. After adding links you will be able to play the album directly from Musicnizer.
For Audio CDs or other types of physical media, it is generally a good idea to fill out the disc# and the location fields. In such way you will be able to find the album easily, without looking through your complete music collection.
