Creating a Catalog of Music Files
Musicnizer can be used to organize music albums on Audio CDs, vynil records, audio cassettes, and any other sort of media. If you have some albums stored as audio files, Musicnizer can create a catalog of them, too. In fact, music files have several advantages:
- They are easier and faster to add to the catalog.
- The albums can be played directly from the Musicnizer catalog.
- Nice catalogs with covers and pictures of artists for hardware players (Dune HD) can be created.
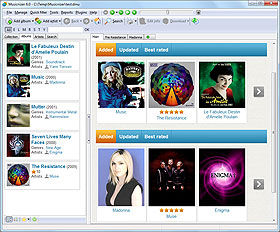
To add your music files, click the "Add album" button on the toolbar of the program and select "From files and folders":

On the right, a directory structure will appear, showing folders on your computer. Mark folders that you want to scan and click the "Find audio" button under the list. Musicnizer will scan the selected folders and populate the main list. After this, you can click "Next" to add the found albums to your catalog.
Musicnizer supports all popular audio formats like MP3, FLAC, APE, AAC, M4A, MP4, OGG, WAV, WavPack, WMA. Further formats can be added in the "File scanner settings" window.
More detailed instructions for adding music files can be found in the corresponding section of the help. In this article, we will pay more attention to some details.
Reading music tags
When adding music albums from audio files, Musicnizer depends on the information stored in music tags of the files. This information typically includes: title, track number, artist, album, year, genre, disc number, etc. In order to have your albums added to the catalog correctly, you need to make sure that music tags contain correct information. Normally they do, but if for some reason information is not correct or missing, you can fix this with a tag editor like mp3Tag Pro.
Musicnizer does not change any existing files, it simply creates a catalog of them. Changing data in the catalog does not change anything in the corresponding music files, so you can safely experiment with the program. If anything goes wrong, you can simply create a new database and re-scan your music.
Downloading covers and photos
When you click "Next" in the "Add album" dialog, Musicnizer starts adding the albums it found. By default, it also downloads album covers and photos of artists from the internet. This is controlled by the following options that you find on the "Download options" tab of the general settings menu (F10):
- Download a cover from Amazon when adding from files.
- Download missing album covers from the Bing service.
- Download photos of artists from the Bing service.
If you have a huge collection of albums, and adding them to the database takes too long, you can disable downloading this information.
Adding albums with multiple discs
Some albums can be published on two, three, or more CD's. Musicnizer can properly add all files from such albums. If files from every CD are stored in their own folder inside the main album folder (for example, a folder "Albumname" contains subfolders "CD1", "CD2", etc.), Musicnizer will add all files into one album entry, as separate CD's (CD1, CD2, and so on).

However, if you prefer keeping files from all CD's in a single folder, Musicnizer will add them as a single CD, ignoring the "Disc#" field from their tags. Of course, in order to be added into a single album entry, all files need to have exactly the same album name saved in their tags.